How to do a DNA-encoded library selection
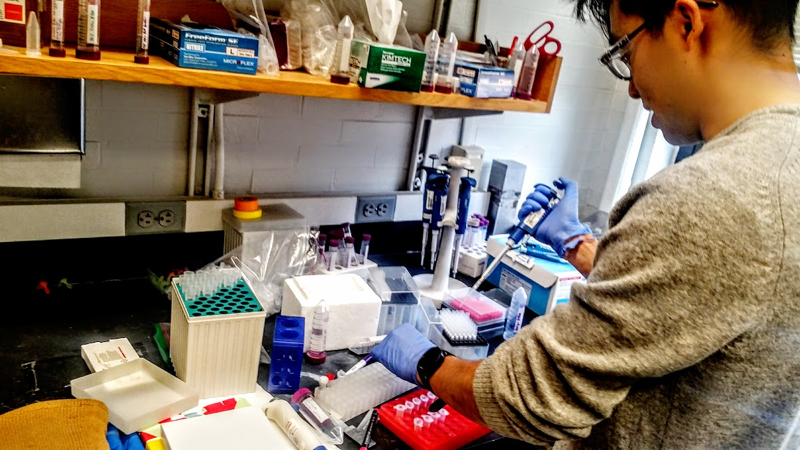
Last Friday I shadowed Alix Chan, a graduate student in David Liu’s laboratory, to learn how to do DNA-encoded library (DEL) selections by watching him do a selection against recombinant PrP. In this blog post I’ll give a brief introduction to what this method entails, and then I’ll share my step-by-step notes on how to do a DEL selection.
introduction
A DNA-encoded library (DEL) is a pooled collection of small molecules, each covalently linked to a unique DNA sequence. DELs offer a way to screen tremendous numbers of small molecules against a protein of interest. The basic principle is this: you expose a protein of interest to the DEL, sequence the DNA that is found associated with the protein, and compare it to the sequences of the DNA for the overall library to determine which sequences are enriched in association with the protein.
Because everything is done in a pooled format, DELs allow chemists to create enormous combinatorial libraries with a fraction of the effort that would be required to make a similarly large arrayed library. Similarly, a biologist can perform the selection (the word screen is not used with DELs) with a small amount of protein, time, and effort, compared to an arrayed high-throughput screen. Many people have argued that all of these features mean that DELs are a very cost-effective way to do small molecule drug or probe discovery. Stuart Schreiber has pointed out that any such cost benefit is at least partly offset by the need to resynthesize each hit from scratch. Instead, what may be most exciting about DEL selection is that it is an assay for binding, whereas many other comparably high-throughput assays are actually measuring something else, such as thermal stabilization or functional inhibition.
The earliest inkling of the idea behind DELs is generally acknowledged as [Brenner & Lerner 1992], but the technology has come a long way since then. The Liu lab worked out a technology they call DNA-templated synthesis [Gartner & Liu 2001, Gartner 2004] for making combinatorial libraries of macrocycles (cyclized short peptides). A variety of amino acids, including non-standard amino acids, serve as building blocks for the macrocycles. Each amino acid is conjugated to a 8-, 10- or 12-base pair single-stranded DNA oligonucleotide, which you can think of as analogous to a tRNA. A longer DNA oligo is then used as a template to which these tRNA-like oligos can hybridize, lining up the amino acids in the right order such that after peptide bond formation and cyclization, each template oligo yields one unique macrocycle linked to one unique single-stranded DNA barcode, plus a biotin tag for purification.
DNA-templated synthesis is just one approach to creating a DEL. There also exists DNA-recorded synthesis, in which the DNA that ends up bound to the small molecule doesn’t represent a template for making the small molecule, but is just the product series of DNA ligation reactions performed in parallel to small molecule synthesis to create a record of what reactions the molecule went through. There are other approaches too — for reviews, see [Kleiner 2011, Li 2015].
While the chemistry of synthesizing DELs is fascinating, most of it is over my head as a biologist. The main purpose of this post is to walk through the principles of DEL selection, and the practical question of how to actually do such a selection.
assay principle
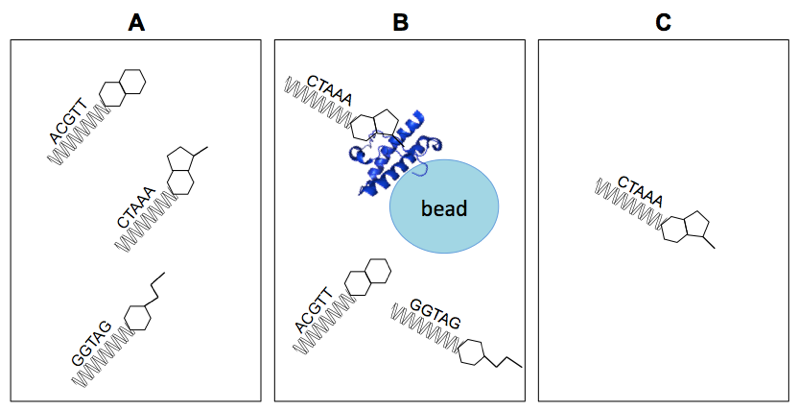
Above: simplified representation of the assay principle for DEL selection. A) The DEL contains small molecules each linked to a unique DNA barcode. B) Some compounds bind to the protein, others don’t. C) After elution, the DNA sequences of protein-bound molecules are enriched.
A very basic schematic of how DEL selection works is shown above. Some simplifications can be deceiving, however, so a few explanations are merited. Of course, in the diagram above, the small molecules are much simpler, the DNA barcodes much shorter, and the library size much smaller, than is the case in reality. Also, washing away unbound molecules is an imperfect process, so instead of having only the DNA barcodes of protein-bound small molecules at the end, what you really have is statistical enrichment of the DNA barcodes of such molecules.
How does DEL selection work, given that each molecule in the library is present at only femtomolar concentrations, presumably many orders of magnitude below the Kd of any hits? The short answer is that 1) the relatively high concentration of protein (~50 μM in our case, see below) drives the interaction, and 2) the exponential amplification power of PCR is needed to make such small (on an absolute scale) amounts of DNA detectable. See this post on thermodynamics of binding for detail.
planning a selection
Planning a DEL experiment in practice involves several key decisions about the assay details, any one of which can make or break your success.
Protein. We performed a DEL selection on Sonia’s and my protein of interest, the human prion protein. Our first question was what PrP construct to use. PrP is reported to interact directly with RNA [Deleault 2003] and phosphorothioated DNA [Kocisko 2006, Karpuj 2007], presumably through its unstructured N terminus, since the interaction can be blocked by sulfated glycans, another N-terminal PrP binder [Kocisko 2006]. Although I’m not aware of any reports saying that PrP binds to unmodified DNA, I didn’t want to risk it, so we used a truncated construct, HuPrP90-231, lacking nearly all of the N terminus.
Immobilization strategy. The ideal immobilization strategy for your protein is one that is well-validated to work, and doesn’t interfere with the proper folding or any potential small molecule-binding sites. Often people use His- or GST-tagged proteins. In our case, we’re lucky: wild-type PrP, without any His tag, binds to Ni-NTA beads just like a His-tagged protein would — indeed, this is how we purify PrP in the first place. So we used His capture dynabeads to immobilize our PrP.
Buffer. The buffer must not contain anything that could prevent binding to the beads (no imidazole, no EDTA, ideally no HEPES) nor mess with proper protein folding (in our case, no DTT or other reducing agents, since PrP is extracellular and requires a disulfide bond). We had on hand a batch of HuPrP90-231 at ~0.9 mg/mL (it’s 16 kDa so ~56 μM) in nothing but 0.2X PBS buffer, which we had dialyzed sufficiently after elution to get it down to <1 mM imidazole. This met all the requirements.
Secondary assay. DEL selection is a binding assay, so before embarking on one, you’d better have a plan in place for an orthogonal binding assay you’ll use to validate any hits you get (after the arduous process of resynthesis, that is). In our case, we’ve had good experiences with saturation transfer difference NMR (STD-NMR) on our protein.
the day of
We essentially followed this protocol, which is basically the procedure used in [Kleiner 2010, Maianti 2014]. We did ours manually, but a similar automated protocol has also been published [Decurtins 2016].
It is best to block off a full day for a DEL selection. Last Friday I arrived at 12 Oxford St. to meet Alix at 9:30a, and we finished just after 5:00p. And he’s experienced — he said this was the 15th or so time he’s done this — so if you’re doing this for the first time it may take you even longer. On the flipside, that day we also did 14 selections against different protein targets in parallel, and while there are considerable economies of scale, it will probably be a bit quicker if you’re only doing one or a few proteins.
The first order of business is to get out everything you need. You’ll want to get these things out to thaw on ice:
- Protein. Aim for ~40 μg of protein per selection, ideally in a fairly small volume (say, <100 μL). Note that neither molarity nor mg/mL is a perfect way to think about the loading capacity of dynabeads, because they are limited both in number of distinct binding sites and in total surface area. As a benchmark, ThermoFisher’s manual says that 25 μL of beads can load 40 μg of a 28 kDa protein. For our PrP construct, which granted is smaller (16 kDa), we started with a 0.88 mg/mL (55 μM) solution and we used 45 μL of it for 40 μg input protein.
- DNA-encoded library. The goal is to have ~100 amol (1e-16 mol, or about 60 million copies) of each unique small molecule-DNA conjugate, so for the Liu lab library of ~13,000 macrocycles [Kleiner 2010], they use 1 pmol total of the library per selection.
- His-tag isolation dynabeads (or equivalent for your tag system).
Also make and place on ice all the buffers you’ll need. The key here is to use buffers in which you know your protein is well-behaved. The protocol linked above mentions PBST and TBST, which are indeed what we used for PrP, though you might need different buffers for your protein. Here’s what we used:
- PBST. 50 mM sodium phosphate pH 8.0, 300 mM NaCl, 0.01% Tween20. You need 1 mL per selection, i.e. per protein. This is for washing the beads before loading protein, and is also the basis for the elution buffer (final bullet).
- TBST. 50 mM Tris-HCl pH 8, 150 mM NaCl, 0.05% Tween-20. You need 1.1 mL per selection. This is the base for the blocking buffer (next bullet) and is also used for washes after adding the DEL.
- Blocking buffer. Final concentrations: 0.1 mg/mL BSA and 0.6 mg/mL yeast total RNA in 1X TBST (previous bullet). Need 150 μL per selection.
- Library. Dilute 1 pmol of library into each 50 μL blocking buffer. Need 50 μL per selection (final total library concentration: 20 nM).
- Elution buffer: PBST with 300 mM imidazole. Need 50 μL per selection.
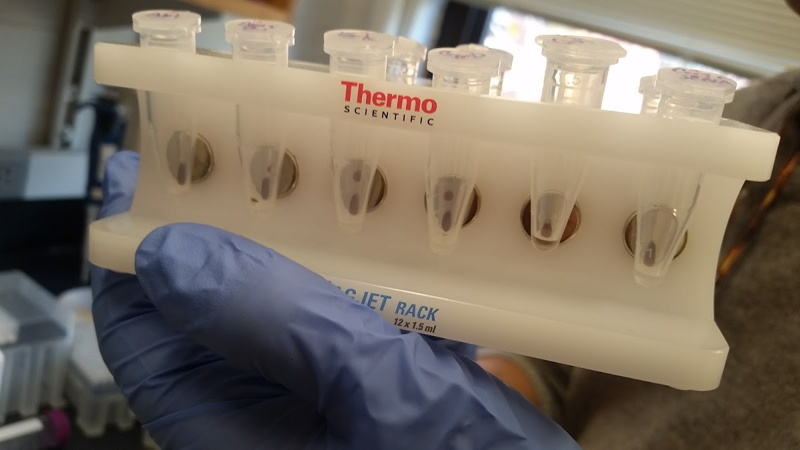
Make sure to have a lot of ice bucket capacity and a number of microcentrifuge tube racks. You’ll also need the magnetic rack used to isolate beads from solution:
If you’re also doing some proteins that require reducing conditions, then you’ll need to make a version of each buffer that also contains 5 mM DTT or TCEP. The one exception is the elution buffer: by the time you’re eluting, you’ve already finished selecting for molecules that bind your folded protein, so it doesn’t matter if the protein now misfolds, so even for cytosolic proteins, there’s no need to bother adding a reducing agent. If you’re doing some proteins that have a different tag — say, if you’re using a Fc or GST system for some of your targets — then you have to remember to start with different beads, and elute in a different manner. As a general rule, there are good economies of scale to processing in parallel many proteins that use the exact same tag and the exact same buffer conditions, since you only need to remember to treat them differently once (when adding the protein itself) and otherwise you just do the same thing for all of them at each step. Processing proteins with all different tags or buffer conditions on the same day is less of a bargain and will end up slowing you down and increasing the risk you make a mistake at some point.
On our particular day, Alix did 9 proteins in normal (oxidizing) conditions, and 4 proteins in reducing conditions, plus 1 “beads only” control (in oxidizing conditions — no need to do both), all with His dynabeads. For one of the proteins, there was also an extra wrinkle that he wanted to select only non-active site binders, so he had to pre-incubate the protein with a potent active site inhibitor. Doing 14 proteins in parallel fits comfortably within one pooled MiSeq run for the sequencing at the end of all this, but as noted above, it was a bit of a long day and if I were doing this myself for the first time I’d definitely only do proteins with identical conditions in parallel.
The most striking thing about the entire day was the incredible care that Alix took to prevent contamination. He showed me a figure demonstrating that the library DNA content found in the eluent, which is what you sequence at the end of all this, is only 0.007% of the input DNA found in the library itself. Or to think about it differently, each wash step reduces the DNA content by 2-3 logs. The fact that we’re operating on a log scale means that even minute contamination is devastating. For instance, if a drop comprising 1% of the volume of wash 1 finds its way into wash 2, it could easily comprise >50% of the DNA at that step, effectively abolishing any hope of seeing a true signal. This is only an issue if the DNA with which your material gets contaminated shares the primers used in the library; contamination with random genomic DNA from, say, bacteria on the bench or humans hanging out in the lab is less of a concern.
Here are some of the steps Alix took to minimize any risk of contamination:
- Do the selection in a different place (a different bench or even a different room) than where the library was synthesized.
- Never let the solution in your tubes get into the cap. If it does, then when you open the cap it could spray DNA everywhere, contaminating other tubes. If you ever see solution in a cap, pipette it carefully into the main volume of the tube and then transfer to a new tube and throw the old one away.
- DNA can stick to plastic, which has a few implications. First, it is helpful to include a bit of Tween in the buffers, as we’ve done here (see above). Once you’re at the step of washing the library away, at each wash step, transfer the beads to a new tube. This ensures that any DNA that is stuck to the side of a tube will not be carried over through a wash step. Finally, you should use these DNA LoBind tubes for, at a minimum, any solution that will be frozen with DNA in it, and perhaps for every step.
The first step in the selection is to wash the dynabeads with PBST solution. Add 25 μL of beads to each tube, add 300 μL PBST, pipette up and down to mix, use the magnetic rack to isolate the beads and pipette out the supernatant. Repeat. The washing ensures that the 20% ethanol the beads are stored in will be completely removed. The inclusion of a small amount of Tween20, a detergent, in the buffer is intended to reduce non-specific sticking to the beads, and to reduce the propensity of the protein to cause the beads to clump together, though as we’ll see later, it can happen anyway. You’ll notice the beads are rust brown, in sharp contrast to the blue I was used to from Ni-NTA agarose beads. The brown color is actually the iron that makes the beads magnetic, and all dynabeads are this color regardless of which capture system they use.
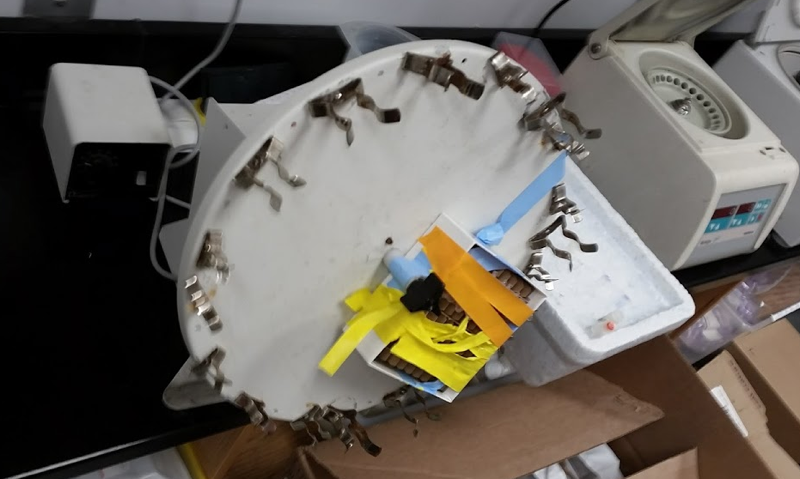
The next step is to bind your protein to the beads. After pipetting away the second wash solution, add the appropriate amount of your protein to the beads, then top up to 300 μL total with PBST. Pipette up and down to make sure everything is thoroughly mixed. Then you want to incubate this mixture, gently rotating, at 4°C, for half an hour. The catch is, as noted above, you don’t want to get any of the solution in the cap, because then when you open the cap, your protein could spray everywhere and contaminate other tubes or reagents on the bench. So how to do gentle rotation at 4°C without inverting the tube? The Liu lab has precision-engineered a cutting-edge high tech invention to solve this problem:
After thirty minutes of this, the beads will remain in a homogeneous slurry for most proteins. For a few sticky proteins, including PrP, we learned, the beads will clump a bit:
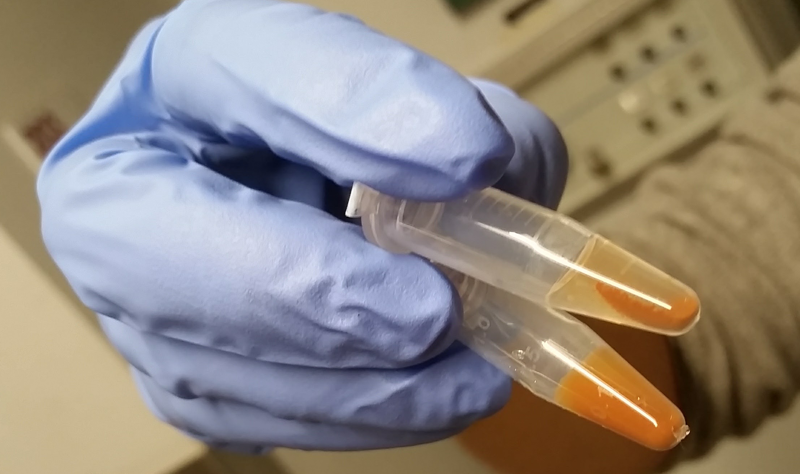
Top: PrP, which caused the beads to clump. Bottom: A different protein which behaved more normally.
This sounds like a big problem, but it’s actually no big deal. IDE, an extremely well-validated target for DEL selection which is often used as a positive control, clumps up like this too. Just pipette up and down to re-mix.
By the way, if you want to skip every step up to this point, you can simply purify your protein directly onto the appropriate dynabeads in the first place, and start from already protein-loaded beads. In my case, I guess instead of isolating and refolding my PrP on Ni-NTA agarose beads like usual, I could actually have the His capture dynabeads right in my column. Because my yield varies, though, I’d still probably want to split the batch and elute half of it so that I could measure the protein level. And by the way, in general, for any protein prep, one important question is how you know that your protein is correctly folded while it’s on the beads. For proteins with a biochemical assay (proteases, kinases, etc.) you can directly test activity while bead-bound. For PrP, with its largely mysterious native function, there’s no such luck. Our confidence comes from having purified 15N-labeled PrP on Ni-NTA agarose beads, eluted it, and having then obtained 2D NMR spectra that match published peaks for the folded protein. Of course, there is still no guarantee that it has that same fold while bound to the beads, nor is there any guarantee that the fold of recombinant PrP tells the full story of how it folds on the cell surface in vivo — but that’s science for you.
Next, use the magnetic rack again to re-isolate beads, and remove the excess protein. If your protein is precious and you want to re-use any excess, and/or if you’re worried there’s a chance it might not have bound the beads and you’ll want to save it to debug why the experiment failed later, you might freeze this excess at -80°C. Wash twice with 300 μL of TBST, re-isolating the beads each time.
Next, add 100 μL of blocking solution to the beads, because you don’t want to be enriching small molecules, or their DNA barcodes, that simply stick to the beads or to your protein non-specifically. The BSA in the blocking solution will help sop up any non-specific small molecules, and the yeast total RNA will take on any non-specific nucleic acid-protein interactions (for instance, maybe an arginine-rich patch binding electrostatically to the DNA backbone). In theory it would be even better to block with DNA rather than RNA, but DNA is harder to get rid of later on (more on this below). Anyway, incubate the beads with the blocking solution for 15 minutes at 4°C, again in the high-tech contraption pictured above.
Now for the real thing. After blocking, isolate the beads, remove the blocking solution, and add 50 μL of your DNA-encoded library, which itself has been diluted into more blocking buffer (see above). Incubate this for 60 minutes at 4°C, again in the gentle rotating device. This is your longest break in this whole day at the bench, and a good time for lunch.
Before the hour is up, set up a big tube rack for what comes next. You want one column per selection (per protein) that you’re doing, and six rows:
- flow-through (FT)
- wash 1
- wash 2
- wash 3
- beads
- eluent
When the hour is up, isolate the beads using the magnetic rack and pipette away the remaining solution. This liquid is referred to as the “flow-through”, or FT for short. This contains most of the rest of your library — what didn’t bind to the target — and can be saved for re-use (see interlude below). Then wash three times with 300 μL TBST. There is a particular flow to how you do the washes here. Each time you do a wash, move to a new tube. For instance, after you remove and set aside flow-through, add 300 μL TBST, pipette up and down to re-suspend the beads, transfer the beads in suspension to a new tube, isolate the beads on the magnetic rack, and then move the supernatant (the wash) back to the tube that the beads used to be in. This way wash #2 takes place in a tube that has never borne witness to a DNA concentration as high as that seen in the flow-through, and instead takes place in a tube that has only seen the DNA concentration in wash 1. If you’re doing a batch of selections in parallel, then as you’re doing all this, only have 1 or 2 proteins out on the rack at a time — leave the rest on ice while they’re waiting to be processed. After you remove the third wash, add 50 μL of the elution buffer (PBST with 300 mM imidazole). You want the DNA to be pretty concentrated, but the bead slurry is too viscous if you use too little volume, so 50 μL is a good compromise. Pipette up and down to re-suspend and leave sit at room temperature for 5 minutes. After 5 minutes, transfer the eluent to a new tube.
You save all six steps (as listed above) from this last process. If your experiment goes well, you’ll sequence the DNA in the eluent, get your results, and move on with your life. If your data end up looking funny, however, the other tubes you’ve saved can be useful for debugging. For instance, you can go back and do qPCRs on each wash to confirm the expected decline in DNA content with each wash step, and/or you can run your flow-through out on a gel to make sure you didn’t accidentally elute the protein too soon, or you can run what’s still bound to your beads on a gel to make sure you did elute the protein eventually. It is not common to need to go back to any of these steps, at least once you know what you’re doing, but throw them in the freezer anyway until you get the results of your experiment, just in case. The eluent can be stored at 4°C.
Here’s a brief interlude on re-use of libraries. One DNA-templated library synthesis effort yields enough library for about 100 selections, but you can stretch it a few times further if you re-use the flow-through for a future selection. The principle here is that your library contains thousands of unique small molecules, and only a handful (at best!) will be hits. The abundance of the rest of them should be pretty much unaffected by the selection process. Indeed, to the extent that some molecules are depleted during a selection, you could argue this is a feature rather than a bug, because you’d rather avoid hits that are non-specific enough to have also appeared as hits for a different target in a previous screen. If you want to re-use your library, you do need to handle it with exceptional care, making sure it doesn’t get contaminated and doesn’t spend much time at room temperature to get degraded. So as soon as you collect your flow-through, put it in a LoBind tube and throw it on dry ice, and move it to the -80 freezer when you have a chance. Periodically, when you have leftover flow-through accumulated from tens of different selections, pool them together, treat with RNAse to remove the yeast total RNA, and then run them through a spin column (basically a MiniPrep), which will purify the barcoded DNA (which is large enough to bind to the membrane) while removing any DNA bits and pieces as well as protein (which will pass through). Then elute with water or TE buffer. In theory you’ve removed the RNA and non-library DNA from the sample, which means that if you NanoDrop it, the nucleic acid concentration indicated by the 260 nm absorbance actually reflects the concentration of the library itself. Still, as you re-use your library (you can probably get 3 or 4 re-uses out of it), you should periodically do a qPCR using the primers on the DNA barcodes to make sure that the concentration of barcodes matches the concentration given by the NanoDrop.
And that’s all I saw on the day I shadowed Alix. The day ends with 50 μL of an eluent, stored at 4°C, which should contain some population of DNA barcodes, statistically enriched for barcodes of small molecules that bind your protein target. What remains is to PCR amplify this DNA, prep it into an Illumina sequencing library, and submit for sequencing on a MiSeq or similar. The PCR that you’ll do depends upon the details of how your library is encoded.The PCRing adds another day of calendar time but not much hands-on time. Depending on sequencing capacity in your lab or at your core facility, waiting in the queue for a slot on the MiSeq will probably be the limiting factor on when you get your data.
From reading up on DELs [Kleiner 2010] and talking to Alix and others in the lab, I learned a bit about the analysis of DEL data. The abundance of each barcode in your eluent is compared to its abundance in the parent library, which will have been sequenced more deeply early on to get a baseline (in theory all library members are created equal, but in practice some are much more abundant than others to begin with). You plot the abundance or rank of abundance in the parent library on the x axis, and relative enrichment in the eluent on the y axis. Barcodes with low abundance in the parent library aren’t interesting — as touched on here, PCR can amplify small stochastic events in early PCR stages into nominally large differences that aren’t actually meaningful. Instead, you look for barcodes with reasonable abundance to begin with, that have strong enrichment. Further, you can’t just look for individual hits, as enrichment of just one molecule could still be due to some weird artifact. Instead, you look for structure-activity relationships (SAR) among molecules that exhibit enrichment. In a DNA-templated library, if you see just one “codon” enriched (e.g. there are many “hits” with the same codon in codon position 1), that could just be non-specific binding or even the DNA sequence itself binding to the protein. The best evidence that you have “real” hits on your hands is if you see a non-consecutive set of codons enriched. For example, in [Kleiner 2010] they found a set of hits with the same amino acid in positions A, C, and D, but with different amino acids in position B. In [Maianti 2014] the best hits for IDE shared positions A, B, and D but had different C amino acids. As an example, Alex sent me these primary selection data from an IDE screen:
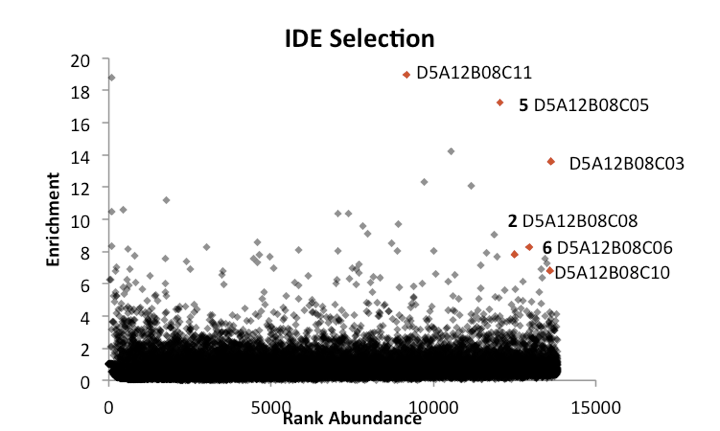
Above: Data shared by Alix Chan, from a DNA-encoded library selection against IDE. Each point represents one DNA barcode, x axis is rank abundance, y axis is fold enrichment in IDE selection vs. parent library. Note this is a linear y axis, so 20 simply means 20-fold enrichment. Red dots represent a cluster of closely related macrocycles which share “codons” A12, B08, and D5, but differ in codon C. Bold numbers (2, 5, and 6) indicate macrocycles that were re-synthezied and validated to bind in [Maianti 2014].
If you see an SAR like the one pictured above, you’re in business, and it’s time to start re-synthesizing individual hits to test by an orthogonal assay such as STD-NMR, or a biochemical activity assay. The Liu lab does all of its resynthesis in-house, though Alix said in principle there’s no reason you couldn’t hire a CRO to do it.
Before I sign off, one final topic we chatted about while waiting during the various incubations was how to validate a brand-new DNA-encoded library if you’ve just synthesized your own. He said the first step, before you waste any of your library, is to make sure you can do a mock selection and get the right result with a positive control. The classic positive control is commercially available His-tagged carbonic anhydrase with any of a number of commercially available inhibitors [Gartner 2004]. To make a “mock library”, for whatever your DNA encoding scheme is, order a bunch of random DNA with the same primers and same general barcode structure that will appear in your library. Make sure it’s PAGE-purified so you don’t get truncation products. For single-stranded DNA-templated libraries, hairpin loops can be a confounder, so you want the mock library DNA to be generally similar to your actual barcodes. For double-stranded DNA-recorded libraries this is less of an issue. Spike your positive control small molecule, conjugated to a known barcode sequence, into this “mock library”, do the whole selection, and see if you get the positive control back out at the end. If yes, then repeat, but using your actual library rather than the mock library.

About Eric Vallabh Minikel
Eric Vallabh Minikel is on a lifelong quest to prevent prion disease. He is a scientist based at the Broad Institute of MIT and Harvard.